Choosing the wrong hiking backpack can turn an amazing adventure into a painful chore. You need a pack that feels like a part of you, not a burden.
A good hiking backpack is one that fits your body correctly, has the right volume for your gear, and is built for comfort. It must have a robust Suspension System1 to transfer weight to your hips, proper ventilation, and durable, weather-resistant materials.
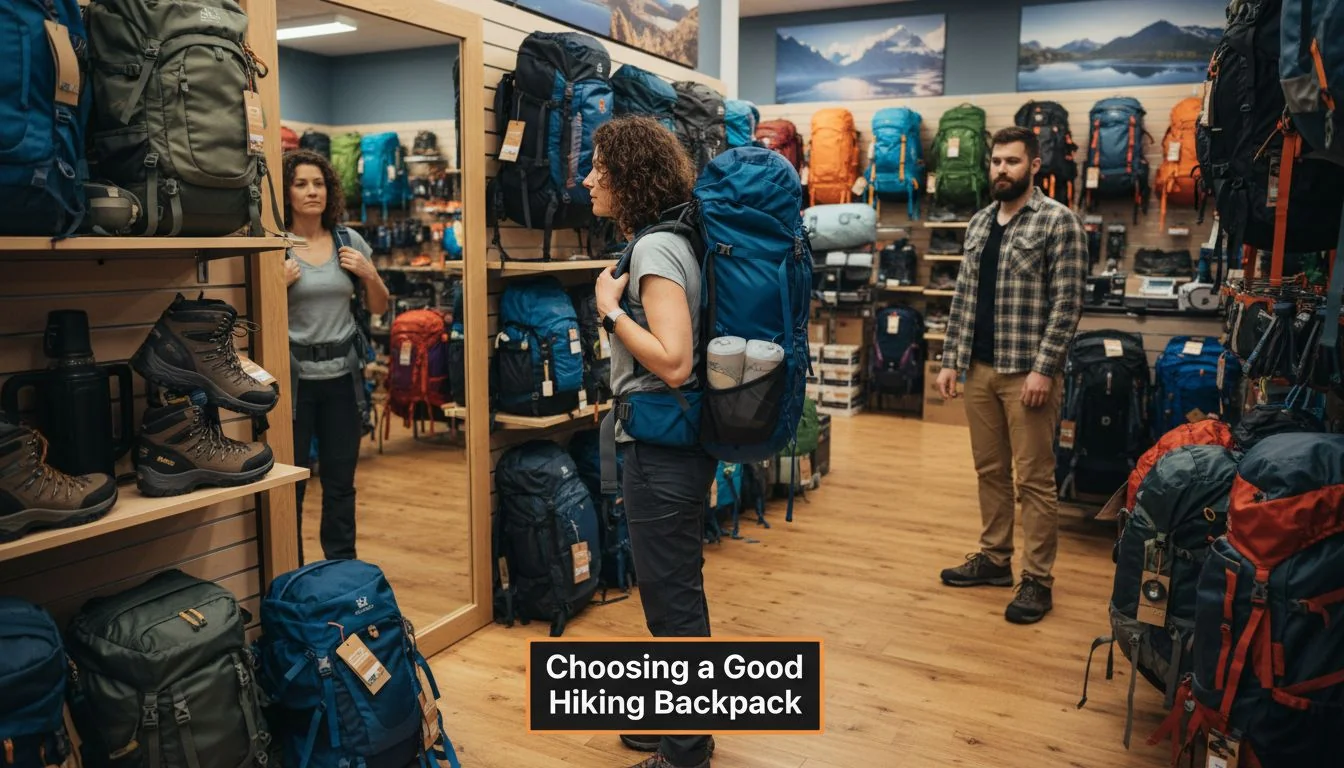
Finding the perfect hiking backpack can feel overwhelming with so many options available. As someone who has worked with countless brands to design and manufacture bags, I’ve learned that the best pack is always a combination of smart design, quality materials, and a perfect fit.
It’s not just about carrying your gear; it’s about carrying it comfortably and efficiently so you can focus on the trail ahead. Let’s break down exactly what you should be looking for, so you can choose a pack that will be your trusted companion on many adventures.
[claim claim=”All hiking backpacks are waterproof.” istrue=”false” explanation=”Most hiking backpacks are water-resistant, not fully waterproof. They are often treated with a DWR coating and may include a rain cover, but their seams and zippers are points of failure in heavy rain.”]
[claim claim=”The primary purpose of a backpack’s hip belt is to stabilize the load.” istrue=”false” explanation=”While it does stabilize the load, the primary purpose of a well-designed hip belt is to transfer about 80% of the pack’s weight from your shoulders to your hips, which are much better at carrying heavy loads.”]
What Features Should You Look for in a Good Hiking Backpack?
Staring at a wall of backpacks with endless straps and pockets is confusing. You might focus on the wrong things and end up with a pack that causes you pain.
The most critical feature is a robust suspension system, including a Padded Hip Belt2 and an internal frame. Also, look for good back panel ventilation, durable materials like ripstop nylon, compression straps, a hydration sleeve, and accessible pockets on the hip belt.
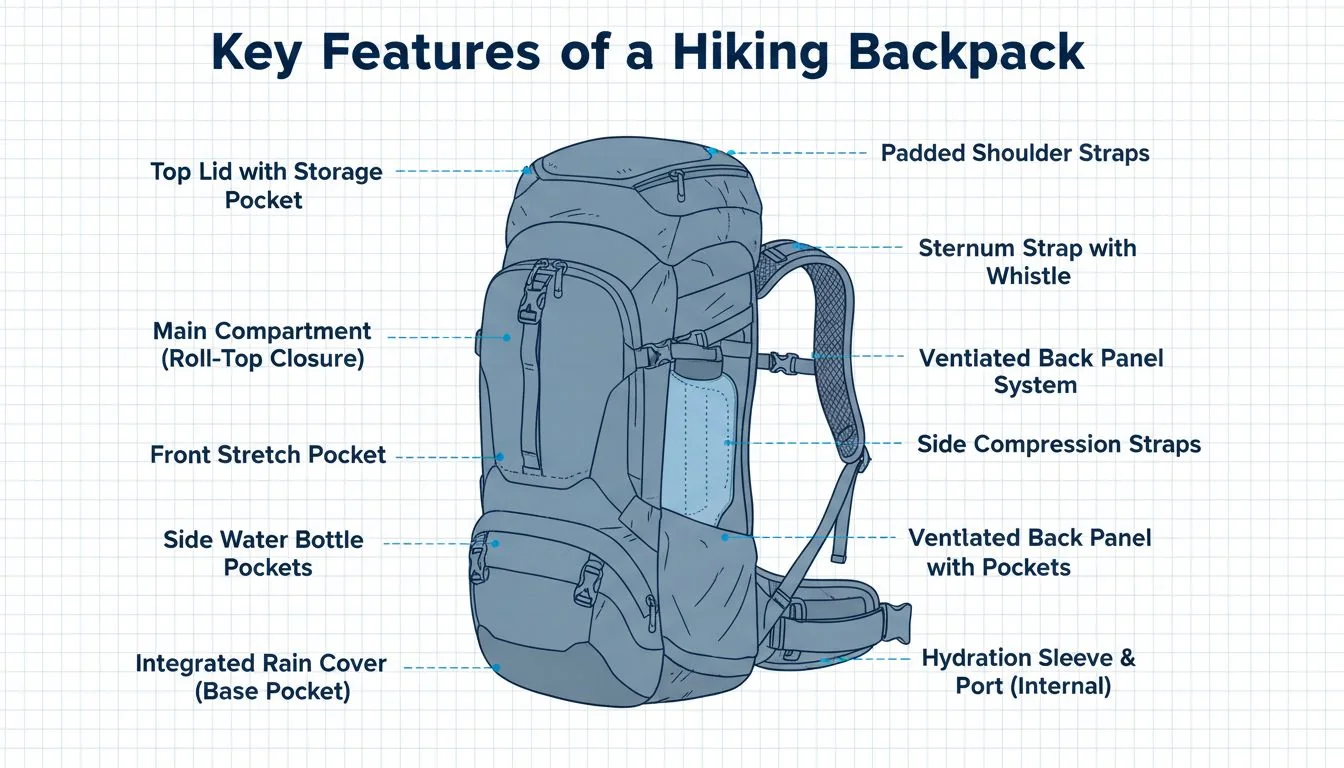
When I work with product managers to develop a new backpack line, we always start with the "engine" of the pack: the suspension system.
An expert from REI once told me, "If the hip belt doesn’t comfortably transfer that weight onto your hips… then none of the other features matter." This is the absolute truth. All the fancy pockets in the world won’t help if your shoulders are screaming in pain after the first mile. A good pack is an engineered system where every part has a job. Let’s look at the most important ones.
Key Backpack Feature Breakdown
| Feature Category | Specific Component | Why It’s Important |
|---|---|---|
| Suspension System | Padded Hip Belt & Internal Frame | Transfers 80% of the weight to your hips, preventing shoulder and back strain. The frame provides structure. |
| Ventilation3 | Suspended Mesh or Foam Channels | Allows air to circulate between your back and the pack, reducing sweat and increasing comfort in warm weather. |
| Load Stability | Compression Straps4 & Load Lifters | Cinch down the pack’s contents to prevent shifting, keeping the load stable and close to your center of gravity. |
| Accessibility | Hip Belt Pockets & Stretch Pockets | Provides easy, on-the-go access to essentials like snacks, your phone, or a map without having to take the pack off. |
| Hydration | Hydration Reservoir Sleeve5 | A dedicated internal pocket for a water bladder with a port for the hose, making it easy to stay hydrated on the move. |
[claim claim=”A pack’s color is just for aesthetics.” istrue=”false” explanation=”While mostly aesthetic, a brightly colored backpack can be a safety feature, making you more visible to rescuers in an emergency situation.”]
[claim claim=”Compression straps are mainly for attaching extra gear to the outside of your pack.” istrue=”false” explanation=”Their primary function is to compress the load inside the pack, making it more stable and easier to carry. While they can be used to attach gear, that is a secondary use.”]
How to Choose the Right Size Hiking Backpack for Your Needs?
Buying a huge pack thinking "bigger is better" is a classic mistake. You will inevitably fill the extra space with things you don’t need, making your hike unnecessarily difficult.
Choosing the right size involves two things: pack volume (in liters) for your gear and pack fit (Torso Length6) for your body. Match the volume to your trip’s duration, and always get your torso measured for the correct fit.
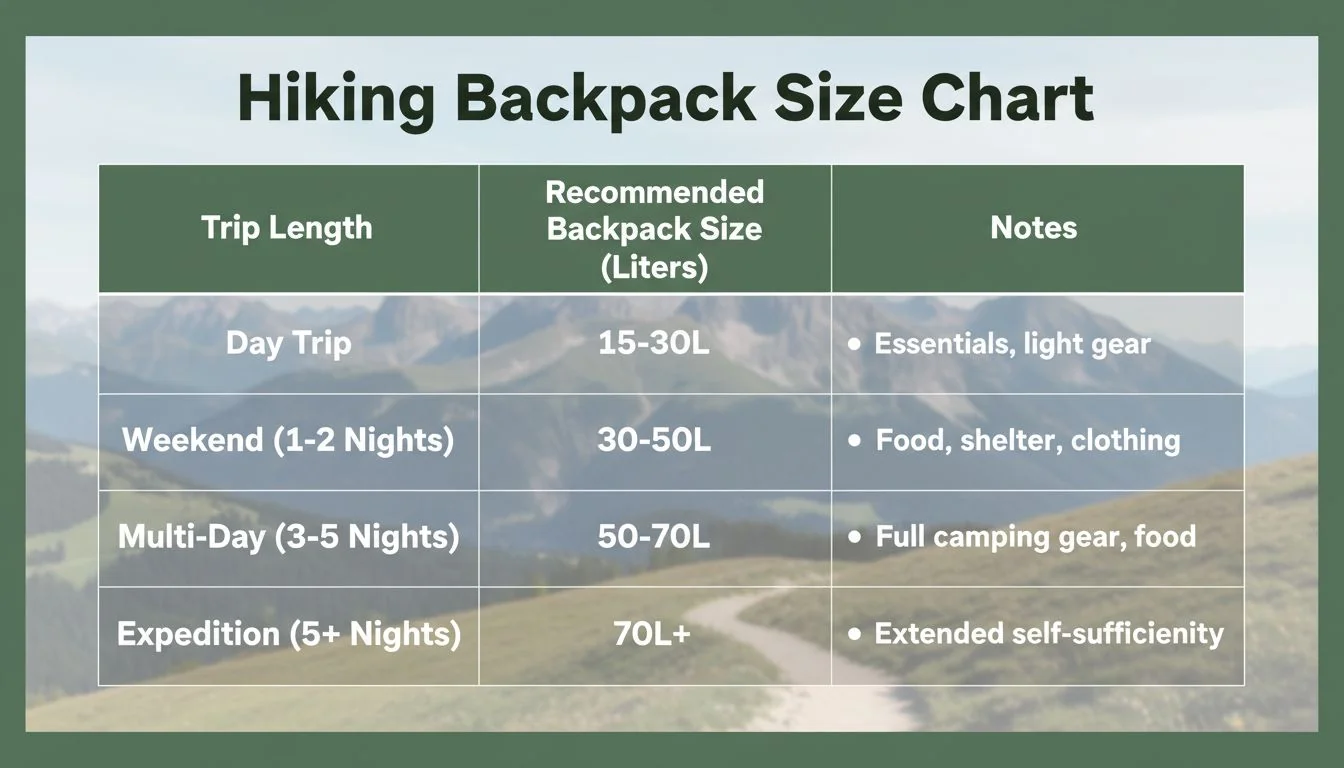
I once saw a hiker on a simple day trail struggling with a massive 70-liter expedition pack. He was exhausted and miserable. A thru-hiker I know gave the best advice: "Lay out all the gear you actually need… Then, choose the smallest pack that will hold it all." This forces discipline.
Sizing is about both capacity and fit. Capacity is measured in liters and depends on your trip length. Fit is about your torso length, not your height, and is crucial for comfort.
Matching Pack Volume to Your Hike
| Trip Duration | Recommended Volume | Typical Gear |
|---|---|---|
| Day Hike | 20-35 Liters | Water, snacks, rain jacket, first-aid kit, navigation tools. |
| Overnight (1-2 nights) | 35-50 Liters | Day hike gear + small tent, sleeping bag, sleeping pad, stove. |
| Multi-Day (3-5 nights) | 50-70 Liters | Overnight gear + more food, extra clothing layers. |
| Extended Trip (5+ nights) | 70+ Liters | Multi-day gear + more food, specialized equipment (winter gear). |
Remember, if you invest in modern, ultralight gear, you can often get away with a smaller and lighter pack than these general guidelines suggest.
[claim claim=”Backpack volume is a universally standardized measurement.” istrue=”false” explanation=”While measured in liters, the ASTM standard for measuring pack volume is not used by all manufacturers, leading to some inconsistencies. A 50L pack from one brand might feel slightly different in size from another.”]
[claim claim=”Your torso length, not your height, determines your backpack size (S, M, L).” istrue=”true” explanation=”Backpack sizes are based on the distance from your C7 vertebra to your iliac crest. Two people of the same height can have different torso lengths and require different pack sizes.”]
What Are the Top Brands for Hiking Backpacks?
With so many brands on the market, how do you know which ones truly deliver on quality and comfort? It’s easy to get lost in the marketing and choose a brand that isn’t right for you.
Focus on reputable brands known for quality and fit. Osprey and Gregory are industry leaders for all-around performance. Deuter excels in ventilation, while Arc’teryx and Mystery Ranch offer premium durability. For ultralight, look to Hyperlite Mountain Gear.
An editor from OutdoorGearLab put it perfectly: "The ‘best’ brand is ultimately the one that fits your body the best." While a brand name is a great starting point for quality, the final choice is personal.
An Osprey might feel custom-made for your back, while your friend might swear by their Gregory. The key is to try on packs from a few top-tier brands to see which suspension system and shape works for your body.
A Guide to Top Backpack Brands
| Brand Category | Key Brands | Known For | Ideal For |
|---|---|---|---|
| Industry Leaders | Osprey, Gregory | Exceptional fit, innovative features, great warranties. | Most hikers, from beginners to experts. |
| Ventilation Specialists | Deuter | Highly comfortable and well-ventilated back panels. | Hikers in hot climates or those who sweat a lot. |
| Bombproof Durability | Arc’teryx, Mystery Ranch | Premium materials, robust construction, military/alpine heritage. | Serious mountaineers or those who are very hard on their gear. |
| Ultralight Champions | Hyperlite Mountain Gear, Zpacks | Extremely lightweight packs using advanced materials like Dyneema. | Thru-hikers and minimalists who prioritize weight savings above all. |
[claim claim=”Osprey and Gregory are sister companies.” istrue=”false” explanation=”This is a common misconception. Osprey is an independent, founder-owned company. Gregory Mountain Products is owned by Samsonite.”]
[claim claim=”Mystery Ranch backpacks are known for their unique 3-zip design.” istrue=”true” explanation=”Many of their most popular packs feature a signature 3-zip opening that allows the user to rip the pack open for full, easy access to all contents, a design derived from their military packs.”]
What Materials Make a Hiking Backpack Both Durable and Lightweight?
You need a pack that can withstand scrapes against rocks and branches, but you don’t want it to weigh a ton before you even put gear in it. What’s the secret?
The best packs use a smart combination of materials. The workhorse is high-denier Ripstop Nylon7 (like Cordura®) for abrasion resistance. For hardware, look for industry-standard YKK zippers and Duraflex buckles, which are known for their reliability.

Understanding Backpack Materials
| Component | Common Material | Why It’s Used |
|---|---|---|
| Pack Bottom | 420D-600D Cordura® Nylon | This is a high-wear zone that constantly scrapes on the ground. It needs maximum abrasion resistance. |
| Main Pack Body | 100D-210D Ripstop Nylon | A lighter fabric that offers a great balance of durability and low weight for the main compartment. The ripstop weave prevents tears from spreading. |
| Front/Side Pockets | Stretch Mesh | Allows for flexible, accessible storage of items like water bottles or a rain layer. It’s lightweight and drains quickly. |
| Zippers & Buckles | YKK Zippers, Duraflex Buckles | These are the industry benchmarks for reliability. A failed zipper or buckle can be a major problem on the trail. |
[claim claim=”Dyneema Composite Fabric (formerly Cuben Fiber) is heavy but strong.” istrue=”false” explanation=”Dyneema is famous for being incredibly strong and exceptionally lightweight, as well as fully waterproof. Its main drawback is its very high cost and lower abrasion resistance compared to thick nylon.”]
[claim claim=”Cordura® is a brand of fabric, not a type of fabric.” istrue=”true” explanation=”Cordura® is a brand name for a range of durable, abrasion-resistant fabrics, most of which are based on nylon. It is a premium material often used in high-quality packs.”]

How to Find a Comfortable Hiking Backpack That Fits Properly?
Buying a pack online without trying it on is a huge gamble. An ill-fitting pack is the number one cause of discomfort on the trail, leading to sore shoulders and an aching back.
A comfortable fit is a two-step process. First, measure your torso length (from the C7 vertebra to your iliac crest) to find your pack size (S, M, L). Second, try the pack on with 25-30 lbs of weight to make adjustments.
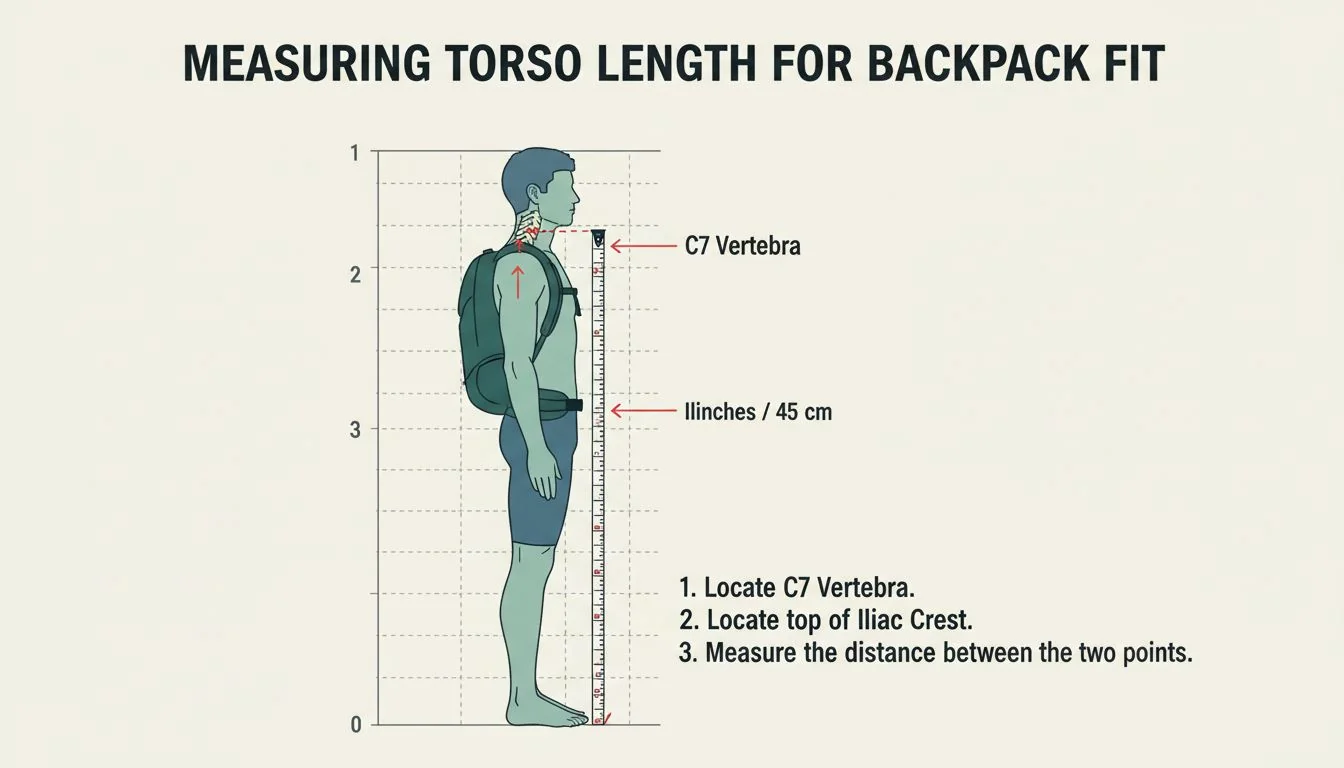
I can’t stress this enough: get measured by a professional. As a gear fitter once told me, "The ‘feel’ under a realistic load is everything." You need to know if the pack is successfully transferring weight to your hips.
When properly fitted, the hip belt should sit squarely on top of your hip bones, taking most of the load. The shoulder straps should wrap smoothly over your shoulders without any gaps. It’s a process of micro-adjustments, but getting it right makes a world of difference.
The Two-Step Fitting Process
Step 1: Find Your Torso Length
To find your torso length, tilt your head forward to find the bony bump at the base of your neck. This is your C7 vertebra. Then, place your hands on your hips to find the top of your hip bones (your iliac crest). The distance between these two points is your torso length. This measurement, not your overall height, corresponds to the pack’s size (Small, Medium, Large).
Step 2: Adjust the Pack with Weight
- Load the Pack: Put 25-30 lbs (11-14 kg) inside.
- Hip Belt: Put the pack on and position the hip belt so the padding is centered over your hip bones. Tighten it snugly.
- Shoulder Straps: Pull the shoulder straps down so they are snug but not carrying the main load.
- Load Lifters: Gently pull the straps located on top of your shoulders. They should be at about a 45-degree angle and remove any gap between the pack and your back.
[claim claim=”A backpack’s waist size is the most important measurement for fit.” istrue=”false” explanation=”While the hip belt needs to fit your waist, the torso length is the most critical measurement for ensuring the pack’s suspension system functions correctly and transfers weight properly.”]
[claim claim=”Most modern backpacks have adjustable torso lengths.” istrue=”true” explanation=”Many high-quality packs feature an adjustable harness system that allows you to fine-tune the torso length within a specific range (e.g., 18-21 inches), ensuring a more precise fit.”]
How to Pick the Right Backpack for Different Hiking Environments?
A great all-around backpack works for most trails, but what if you’re heading into a rainforest, a desert, or up a snowy mountain? Using the wrong pack can be inefficient or even unsafe.
Match your pack’s features to the demands of your environment. For hot climates, prioritize a ventilated back panel. For rainy areas, an integrated rain cover is key. For alpine terrain, you need features like Ice Axe Loops8.
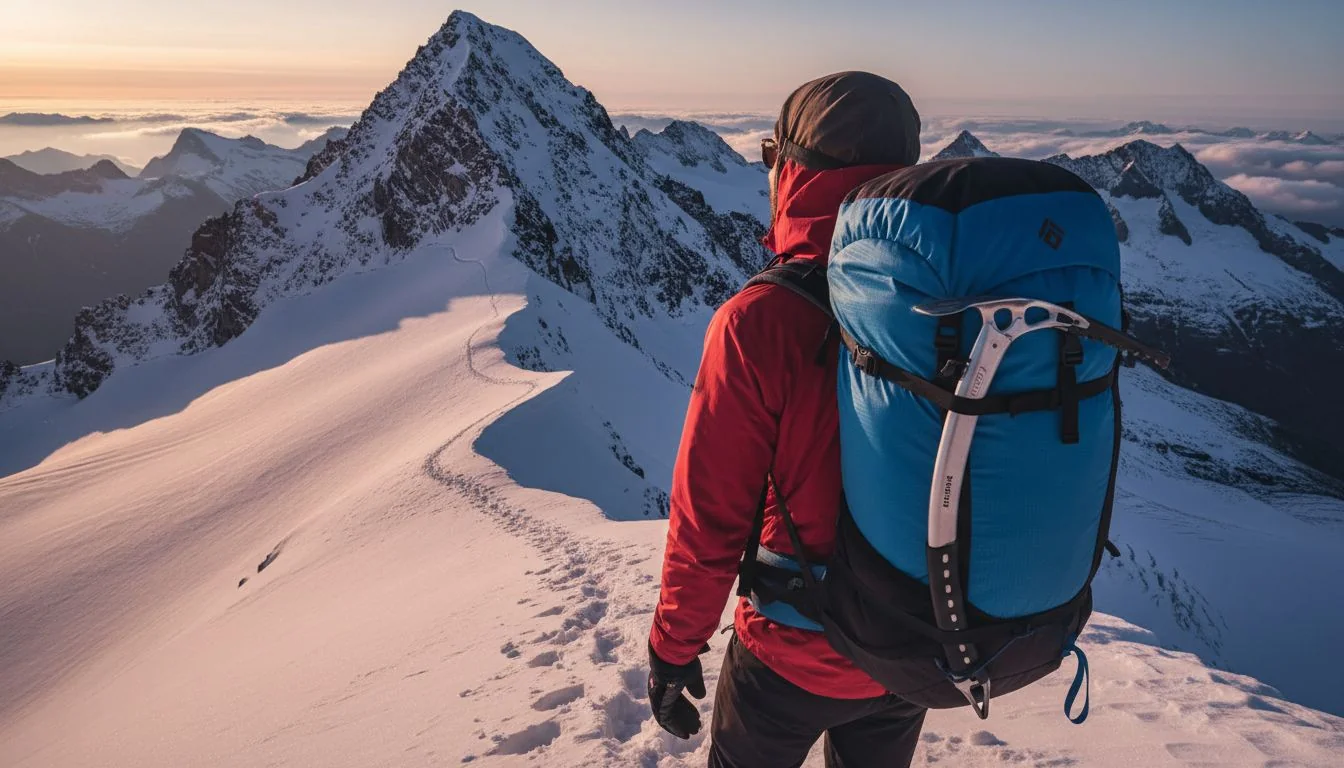
When you move into technical terrain, your pack becomes more than just a bag—it’s a piece of safety equipment. An alpine guide I spoke with was very clear: "An ice axe loop isn’t a ‘nice-to-have’ when you’re on a glacier; it’s essential." Your pack’s design should anticipate the challenges of the environment.
A bulky pack with lots of external pockets might be great for organization on a forest trail, but it can be a liability in the mountains where it can snag on rocks. Always think about the most demanding part of your trip and choose a pack that is built for it.
Matching Your Pack to the Terrain
| Environment | Key Feature | Why It’s Important |
|---|---|---|
| Hot & Humid | Suspended Mesh Back Panel | Creates a large air gap between you and the pack, maximizing airflow to keep you cooler and drier. |
| Wet & Rainy | Integrated Rain Cover9 / Waterproof Fabric | Provides quick and reliable protection from downpours. Waterproof fabrics (like Dyneema) eliminate the need for a cover. |
| Desert | External Hydration Access & Large Bottle Pockets | Allows for easy refilling of water bottles and bladders, which is critical when water sources are scarce and consumption is high. |
| Alpine / Winter | Ice Axe Loops, Crampon Patch, Streamlined Design | Securely carries essential technical gear. A reinforced patch prevents crampon points from tearing the pack. A narrow profile avoids snagging. |
[claim claim=”A built-in rain cover makes a backpack 100% waterproof.” istrue=”false” explanation=”A rain cover protects the main body of the pack, but it does not cover the back panel and shoulder straps, which can still get soaked in a prolonged downpour.”]
[claim claim=”You can use any backpack for winter hiking.” istrue=”false” explanation=”While you can, it’s not ideal. Winter packs are designed with features like glove-friendly buckles, avalanche gear pockets, and robust attachments for skis or snowshoes that are critical for safety and convenience.”]
What Are the Key Accessories You Should Look for in a Hiking Backpack?
Staring at a wall of packs, it’s easy to get mesmerized by the forest of straps, loops, and clips. Which of these are essential tools, and which are just gimmicks? A great backpack isn’t about having the most accessories; it’s about having the right ones that solve real problems on the trail.
The best accessories are often the ones smartly integrated into the pack’s design. From a manufacturing perspective, we see features like a rain cover not as an "add-on," but as a core part of a complete hiking system. Here’s what you should be looking for, broken down into what should be built-in and what you should add to complete your kit.
Essential Integrated Features (The "Must-Haves")
These are features that should come with the pack. Their absence can be a deal-breaker.
- Integrated Rain Cover: A waterproof shield that fits over your bag is non-negotiable for wet weather. The best packs include a perfectly sized cover stored in its own dedicated pocket, usually at the bottom of the bag. This saves you the expense and guesswork of buying one separately.
- Trekking Pole Attachments: These are loops and bungee cords designed to securely store your poles when you’re not using them. Look for systems like Osprey’s "Stow-on-the-Go," which cleverly allows you to attach and detach poles without taking your pack off—a huge convenience.
- Hydration Reservoir Sleeve: While the water bladder is often sold separately, the pack must have the internal sleeve and a hose port to accommodate it. This allows for critical hands-free hydration.
- Hip Belt Pockets: We mentioned these before, but they bear repeating. Accessible pockets on the hip belt are essential for storing high-use items like your phone for navigation, snacks for energy, or sunscreen.
[claim claim=”Osprey’s ‘Stow-on-the-Go’ is the only system that allows for on-the-move pole storage.” istrue=”false” explanation=”While Osprey’s system is the most well-known, other brands have developed similar on-the-fly attachment systems using bungee cords and loops, though they may function differently.”]

Crucial Add-On Accessories (Complete Your System)
These items are usually sold separately but are essential for a safe and comfortable trip.
- Hydration Reservoir (Bladder): The pack has the sleeve, but you need the bladder. Invest in a good 2-3 liter reservoir with a high-flow bite valve and a quick-disconnect hose for easy refilling.
- Dry Sacks / Pack Liner: This is the expert’s secret to guaranteed dry gear. Even with a rain cover, pack your most critical items—sleeping bag, puffy jacket, electronics—inside waterproof dry sacks. For a cheap but effective alternative, a heavy-duty trash compactor bag makes an excellent waterproof liner for the entire main compartment.
- Gear Straps: A couple of lightweight gear straps are invaluable for lashing bulky items like a foam sleeping pad or tent to the outside of your pack using the built-in gear loops.
A gear reviewer for Backpacker Magazine gave this excellent advice: “Don’t be swayed by a pack that looks like a Christmas tree with a million loops. Instead, look for features that solve a real problem. Do you constantly need your phone for navigation? Prioritize large hip belt pockets. The best features are the ones you’ll use on every single hike.”
[claim claim=”A pack liner is better than individual dry sacks.” istrue=”false” explanation=”Both have pros and cons. A pack liner is a simple, lightweight solution, but if it fails, everything gets wet. Individual dry sacks offer redundant, organized protection but add slightly more weight and cost.”]
[claim claim=”An integrated rain cover is always better than a separate one.” istrue=”false” explanation=”While convenient, an integrated cover is sized for that specific pack. A separate cover can be chosen for better coverage or lighter weight, and can be used on other packs.”]
Conclusion
Finding a good hiking backpack comes down to matching the pack’s fit, volume, and features to your body and your specific hiking plans. Start with fit, and the rest will follow.
References
-
Understanding the suspension system is crucial for comfort and load distribution, ensuring a pleasant hiking experience. ↩
-
A padded hip belt is essential for transferring weight and reducing shoulder strain, making it vital for long hikes. ↩
-
Good ventilation helps keep you cool and dry, enhancing comfort during hikes in warm weather. ↩
-
Compression straps help stabilize the load, preventing shifting and ensuring a balanced carry, which is essential for comfort. ↩
-
A hydration reservoir sleeve allows for easy access to water, keeping you hydrated on the go, which is crucial for any hike. ↩
-
Measuring torso length is key to finding the right fit, which directly impacts comfort and performance on the trail. ↩
-
Ripstop nylon offers durability and lightweight properties, making it ideal for rugged outdoor use. ↩
-
Ice axe loops are critical for safely carrying technical gear in alpine environments, enhancing safety during challenging hikes. ↩
-
An integrated rain cover provides essential protection from rain, keeping your gear dry and safe during wet conditions. ↩